Showing posts with label Reggio. Show all posts

Monday, May 9, 2016

Watercolors in Gelatin

Molded gelatin injected with pipettes of watercolors. 


Afterwards we put it on the table and let kids cut it up and mush it with their hands.  Great sensory experience!


Then we moved it into the sensory bin!  We also experimented with melting it in the microwave and resetting it over and over.


Cascarones and Spring Experiments

I'm just going to post a whole bunch of our classroom activities in no particular order.  It been a crazy end of year, and now there are only 2 weeks left!  Whaaaaaa????!  I know!!!  I can't believe it either!

Cascarones


 This year we chose to color our eggs using permanent markers.  Naturally, some eggs will get smushed and some will fall and break, so have extras available!  

After the children draw on them, they fill their eggs with confetti and tape the bottom.  I fold and cut colored tissue paper and give it a fringe on one side.  Most cascarones then fold the tissue over so that the fringe is more ballooned, but for our sake it's easier to leave it folded.


We gave the children pre-made cones to glue the tissue paper around.  They really loved playing with the cones and thinking what they could be used for! 


Then we applied glue fringe side up and attached the tissue paper by rolling the cone over the tissue. 


When they were finished we glued the eggs inside the cones.


"Eggs-periment" 

How many books can you place on four eggs before they crack?

The eggs were cut and taped on the bottom before hand.  And we counted as we placed book on top of book.  This was really exciting and fun!


The answer?
43

Dying Flowers

Pretty self explanatory.
Add food coloring to water and watch flowers turn colors.


Not sure how the multicolored flowers got so many different colors on one flower?  They were bought this way.  The kids thought they were so cool!


Monday, September 28, 2015

Experimenting with Watercolor Drops in Water

The key to this is getting the children to only use small drops of water at a time.  As you can guess this can be very challenging for some children.  But if they are able to put the watercolor into the water just drops at a time, it can be quite mesmerizing and beautiful.  Some children didn't want to leave and spent their whole classroom free time at this table.


Wednesday, September 2, 2015

Blow paint

We used water colors, then gave the children pipettes to squirt color onto paper, and then blow around with a straw.  It was very popular, but hard to regulate the amount of paint put onto the paper.


Friday, January 16, 2015

Watercolors with salt

These had three basic directions.

1) Squeeze.  Squeeze the glue onto the cardboard.

2) Shake.  Shake the salt shaker and cover the glue with salt.

3) Drip. This is the hardest part, because it takes control and it's way too tempting to just squirt large amounts of watercolor.  


Paper Plate Swirls

These are really cool and beautiful if you run with them, because they swirl around as you run. Be careful though, the string gets twisted easily and can break.  But if you untwist it every once in a while you should be golden!  

Basically, cut a paper plate in a swirl.  Draw or paint on it.  Then staple one end of it to a string and the other to a large Popsicle stick.
Done.


These really do look beautiful swirling in the air, and the kids loved how they spiraled around as they ran.  

Friday, January 9, 2015

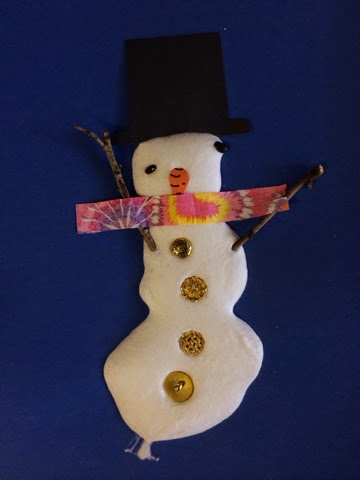
Shaving Cream Snow Creatures

This puffy paint is made from one part shaving cream to one part glue.  The children were encouraged to make any kind of creature that they wanted, but this year they all did snowmen or snow women.  We had a Harry, a Tom, a Darrel and many a Snow Elsa, Olaf or Anna.
We laid out a variety if materials, but also encouraged them to pick anything else they wanted from the collage table.
This is what was created:


The Snow Anna on the left is sitting at a chair with a table eating food, which I thought was very cleaver. 


As I sat with the small group I dictated every child's snow creatures name and what their snow creature was doing.  Then, I put them up on an online art gallery we use.
It takes several days for these to dry!  The first year we did this we hung them up the next day and then discovered that the snow creatures leaked all over the floor.  They also were skinnier after that!